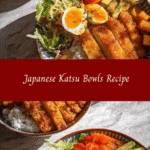
Ultimate Japanese Katsu Bowls Recipe for Flavor-Packed Comfort Meals
There’s something incredibly comforting about a big, hearty bowl of Japanese katsu, especially on a busy weeknight when you’re juggling a million things—kids, work, and somehow still trying to get dinner on the table. That’s why I’m excited to share my Japanese Katsu Bowls Recipe, a dish that brings together crispy, golden chicken cutlets layered over warm rice with a tangy sauce that makes everyone at the table smile. It’s a recipe born from my own kitchen chaos, where perfection takes a backseat to flavor, ease, and the kind of meals that feel like a warm hug after a long day.
Table of Contents
Why You’ll Love This Japanese Katsu Bowls Recipe
If you’re anything like me—a former full-time office worker turned home cook with two little whirlwinds at my feet—you know the value of a meal that’s both simple and satisfying. This Japanese Katsu Bowls Recipe hits that sweet spot. It’s crispy, savory, and packed with flavor, yet it doesn’t require a thousand steps or hard-to-find ingredients. Plus, it’s incredibly versatile. You can swap chicken for pork or even tofu if you want to mix things up.
One of my earliest food memories is standing on a wobbly chair next to my dad, watching him stir pots of lentils and rice while sharing stories. That warmth and connection is exactly what I want to bring to your kitchen with this recipe. It’s about messy counters, full plates, and feeding your people with love—even if the kitchen feels like a tornado just hit it.
Ingredients You’ll Need for This Japanese Katsu Bowls Recipe

- 2 boneless, skinless chicken breasts (about 1 lb)
- 1 cup panko breadcrumbs
- 1/2 cup all-purpose flour
- 2 large eggs
- Salt and freshly ground black pepper, to taste
- 1/4 cup vegetable oil (for frying)
- 3 cups cooked Japanese short-grain rice (or any sticky rice you prefer)
- 1/4 cup tonkatsu sauce (store-bought or homemade—recipe below)
- 2 green onions, thinly sliced (for garnish)
- 1 tablespoon toasted sesame seeds (optional, for garnish)
For homemade tonkatsu sauce (optional):
- 1/4 cup ketchup
- 2 tablespoons Worcestershire sauce
- 1 tablespoon soy sauce
- 1 tablespoon mirin or honey
- 1 teaspoon Dijon mustard
Substitution tips: If you don’t have panko breadcrumbs, regular breadcrumbs will work, but panko gives that extra crunch we love. For a gluten-free version, swap the all-purpose flour for rice flour and use gluten-free panko. If chicken isn’t your thing, thin pork chops or firm tofu slices work beautifully here.
Nutrition Facts
- Calories: Approximately 550 per serving (serves 4)
- Protein: 35g
- Fat: 20g (mostly from frying oil and chicken)
- Carbohydrates: 50g
- Fiber: 2g
- Sugar: 6g (mostly from tonkatsu sauce)
- Sodium: 700mg (can vary depending on sauce and seasoning)
Keep in mind, nutrition can shift a bit depending on portion size and the exact ingredients you use. For example, swapping oil for an air fryer will reduce fat, and homemade sauce lets you control sugar and sodium levels better.
Print
Ultimate Japanese Katsu Bowls Recipe for Flavor-Packed Comfort Meals
Learn how to make delicious Japanese Katsu Bowls Recipe. Easy recipe with step-by-step instructions.
- Total Time: 45 minutes
- Yield: 4 servings 1x
Ingredients
- 2 boneless, skinless chicken breasts (about 1 lb)
- 1 cup panko breadcrumbs
- 1/2 cup all-purpose flour
- 2 large eggs
- Salt and freshly ground black pepper, to taste
- 1/4 cup vegetable oil (for frying)
- 3 cups cooked Japanese short-grain rice (or any sticky rice you prefer)
- 1/4 cup tonkatsu sauce (store-bought or homemade—recipe below)
- 2 green onions, thinly sliced (for garnish)
- 1 tablespoon toasted sesame seeds (optional, for garnish)
For homemade tonkatsu sauce (optional):
- 1/4 cup ketchup
- 2 tablespoons Worcestershire sauce
- 1 tablespoon soy sauce
- 1 tablespoon mirin or honey
- 1 teaspoon Dijon mustard
Substitution tips: If you don’t have panko breadcrumbs, regular breadcrumbs will work, but panko gives that extra crunch we love. For a gluten-free version, swap the all-purpose flour for rice flour and use gluten-free panko. If chicken isn’t your thing, thin pork chops or firm tofu slices work beautifully here.
Instructions
- Start by prepping your chicken breasts. Slice each breast horizontally to create two thinner cutlets, about 1/2 inch thick. This helps them cook evenly and stay juicy. Season both sides with salt and pepper.
- Set up your dredging station: place the flour in one shallow bowl, beat the eggs in a second bowl, and put the panko breadcrumbs in a third bowl.
- Coat each chicken cutlet first in the flour, shaking off any excess. Then dip it into the beaten eggs, and finally press it firmly into the panko breadcrumbs, making sure it’s well coated all over.
- Heat the vegetable oil in a large skillet over medium heat. You want enough oil to cover the bottom of the pan about 1/4 inch deep. To test if it’s ready, drop in a few breadcrumbs—they should sizzle immediately.
- Cook the chicken cutlets in the hot oil for about 3-4 minutes per side, until the crust is golden brown and the chicken reaches an internal temperature of 165°F. Avoid overcrowding the pan; work in batches if needed.
- While the chicken cooks, prepare your tonkatsu sauce by mixing ketchup, Worcestershire sauce, soy sauce, mirin (or honey), and Dijon mustard in a small bowl. Taste and adjust to your liking.
- Once cooked, transfer the chicken to a paper towel-lined plate to drain excess oil.
- To assemble the bowls, divide the warm cooked rice into four bowls. Slice the chicken katsu into strips and place atop the rice.
- Drizzle generously with tonkatsu sauce and garnish with sliced green onions and toasted sesame seeds if using.
- Serve immediately, and enjoy the satisfying crunch and tangy sauce with every bite.
Here’s a little secret from my kitchen: I’ve found that letting the chicken rest for a minute before slicing helps keep the breading from falling off. Also, if your kids are anything like mine, they’ll appreciate the crispy texture, and the sauce makes it fun to dip and eat together.
- Prep Time: 15 minutes
- Cook Time: 30 minutes
- Category: Main Dish
- Method: Cooking
- Cuisine: International
Keywords: Japanese Katsu Bowls Recipe, recipe, cooking, food
Steps to Create Your Japanese Katsu Bowls Recipe
- Start by prepping your chicken breasts. Slice each breast horizontally to create two thinner cutlets, about 1/2 inch thick. This helps them cook evenly and stay juicy. Season both sides with salt and pepper.
- Set up your dredging station: place the flour in one shallow bowl, beat the eggs in a second bowl, and put the panko breadcrumbs in a third bowl.
- Coat each chicken cutlet first in the flour, shaking off any excess. Then dip it into the beaten eggs, and finally press it firmly into the panko breadcrumbs, making sure it’s well coated all over.
- Heat the vegetable oil in a large skillet over medium heat. You want enough oil to cover the bottom of the pan about 1/4 inch deep. To test if it’s ready, drop in a few breadcrumbs—they should sizzle immediately.
- Cook the chicken cutlets in the hot oil for about 3-4 minutes per side, until the crust is golden brown and the chicken reaches an internal temperature of 165°F. Avoid overcrowding the pan; work in batches if needed.
- While the chicken cooks, prepare your tonkatsu sauce by mixing ketchup, Worcestershire sauce, soy sauce, mirin (or honey), and Dijon mustard in a small bowl. Taste and adjust to your liking.
- Once cooked, transfer the chicken to a paper towel-lined plate to drain excess oil.
- To assemble the bowls, divide the warm cooked rice into four bowls. Slice the chicken katsu into strips and place atop the rice.
- Drizzle generously with tonkatsu sauce and garnish with sliced green onions and toasted sesame seeds if using.
- Serve immediately, and enjoy the satisfying crunch and tangy sauce with every bite.
Here’s a little secret from my kitchen: I’ve found that letting the chicken rest for a minute before slicing helps keep the breading from falling off. Also, if your kids are anything like mine, they’ll appreciate the crispy texture, and the sauce makes it fun to dip and eat together. Learn more: Ultimate Comfort Food Creamy Chicken Stroganoff Recipe You Need to Try
Tips for Making the Best Japanese Katsu Bowls Recipe
From my experience balancing kitchen chaos and hungry little helpers, I’ve learned a few tricks that make this recipe a reliable favorite:
- Don’t skip the panko: Its airy texture is what gives katsu that iconic crunch. Regular breadcrumbs tend to be too dense.
- Keep oil at the right temperature: Too hot and the crust burns before the chicken cooks through; too low and the breading gets soggy. Medium heat is your friend.
- Prep your mise en place: Having all ingredients ready before frying saves time and prevents burnt moments, especially when kids are asking for snacks.
- Make the sauce ahead: This can be made a day in advance and refrigerated. It tastes even better after the flavors meld.
- Try an air fryer: For less oil and easier cleanup, air frying the breaded chicken at 400°F for about 10-12 minutes (flipping halfway) works beautifully.
- Rice matters: Using sticky Japanese-style rice keeps the bowl authentic and helps balance the textures.
In my busy household, these small shortcuts have saved me countless times without sacrificing flavor or fun.
Serving Suggestions and Pairings

This Japanese Katsu Bowls Recipe is a full meal on its own, but I love pairing it with some quick sides to round out the table—especially when feeding two hungry kids and my husband after a long day.
- Simple steamed or sautéed vegetables like broccoli, snap peas, or bok choy add color and nutrition.
- A crisp cucumber salad dressed with rice vinegar and sesame oil brings a refreshing crunch.
- Miso soup is a classic starter that warms everyone up and feels like a little celebration.
- For an extra cozy touch, sprinkle some furikake seasoning over the rice—it’s a family favorite at my house.
- A side of pickled ginger or daikon adds a tangy bite that cuts through the richness of the fried chicken.
These simple sides make the meal feel special, even on the busiest nights when the kitchen looks like a tornado just passed through.
Storage and Reheating Tips
Leftovers happen (especially in my house), and this Japanese Katsu Bowls Recipe stores well if you have any to save. Here’s how to keep it tasting fresh:
- Store the chicken cutlets separately from the rice and sauce in airtight containers to prevent sogginess.
- Reheat chicken in a 375°F oven or air fryer for about 5-7 minutes to restore crispiness—microwaving tends to make it soggy.
- Reheat rice in the microwave with a damp paper towel over the top to keep it moist.
- Warm the tonkatsu sauce gently on the stove or in the microwave before drizzling over your reheated katsu bowls.
- Consume leftovers within 2 days for the best flavor and food safety.
Trust me, I’ve learned these tips the hard way after a few soggy, less-than-stellar leftovers!
Frequently Asked Questions
What are the main ingredients for Japanese Katsu Bowls Recipe?
The main ingredients for Japanese Katsu Bowls Recipe include the items listed in our ingredients section above. Each ingredient plays a crucial role in achieving the perfect flavor and texture.
How long does it take to make Japanese Katsu Bowls Recipe?
The total time to make Japanese Katsu Bowls Recipe includes both preparation and cooking time. Check the recipe card above for exact timing details.
Can I make Japanese Katsu Bowls Recipe ahead of time?
Yes, Japanese Katsu Bowls Recipe can often be prepared in advance. Store it properly in an airtight container in the refrigerator and consume within the recommended timeframe.
What can I serve with Japanese Katsu Bowls Recipe?
Japanese Katsu Bowls Recipe pairs well with various sides and accompaniments. Consider the serving suggestions mentioned in the recipe for the best dining experience.
Is Japanese Katsu Bowls Recipe suitable for special diets?
Depending on the ingredients used, Japanese Katsu Bowls Recipe may be adapted for various dietary needs. Check the ingredients list and consider substitutions as needed for your dietary requirements.
Final Thoughts
This Japanese Katsu Bowls Recipe is more than just a meal—it’s a little reminder that cooking at home doesn’t have to be complicated or perfect to be wonderful. It’s about creating moments around the table, sharing food that comforts, and finding joy in the messiness of life and kitchens alike. Whether you’re new to cooking or a seasoned home foodie like me, this recipe is designed to fit into your life and nourish your family with love and flavor.
So next time you’re scrambling to get dinner ready, remember the story of me standing on that wobbly chair, watching my dad stir pots and tell stories. Bring that same warmth to your own kitchen with this recipe. I promise, your family will thank you, and you’ll find a little joy in every crunchy, saucy bite.