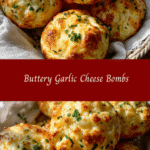
Irresistible Buttery Garlic Cheese Bombs You Need to Try Today
There’s something about buttery garlic cheese bombs that just pulls me back to those cozy evenings in my small, lively apartment where dinner was never just about the food—it was about the mess on the counters, the laughter echoing off the walls, and the simple joy of feeding my family something comforting and delicious. I remember standing on that wobbly chair next to my dad, watching him stir pots while telling stories, and those memories have shaped how I cook: with love, a bit of chaos, and zero pressure for perfection. These Buttery Garlic Cheese Bombs are exactly that kind of recipe—warm, gooey, and forgiving enough to make any weeknight feel special.
Table of Contents
Why You’ll Love This Buttery Garlic Cheese Bombs
Let me tell you, these little bombs of buttery, garlicky goodness are the kind of recipe that makes you want to gather everyone around the table right now. They’re soft, pillowy bites packed with melty cheese and just the right amount of garlic, all wrapped up in a golden buttery crust. As a busy mom juggling work-from-home chaos and two hungry kids, I need recipes that come together quickly without sacrificing that homemade comfort food feeling. These cheese bombs deliver on all fronts.
What I love most is how versatile they are. Whether it’s a last-minute snack, a side for soup, or the star at a weekend dinner, these Buttery Garlic Cheese Bombs never disappoint. They’re also ridiculously easy to make—even if your kitchen feels like a battleground at 5 p.m., these won’t add to the stress. And here’s a little secret from my own kitchen: my kids have been known to sneak a few before dinner even hits the table, which is always a good sign.
Ingredients You’ll Need for This Buttery Garlic Cheese Bombs

- 2 cups all-purpose flour (you can swap half with whole wheat flour for a nuttier flavor)
- 1 tablespoon granulated sugar
- 1 teaspoon instant yeast
- 1/2 teaspoon salt
- 3/4 cup warm milk (about 110°F, warm to the touch but not hot)
- 2 tablespoons unsalted butter, melted (plus extra for brushing)
- 3 cloves garlic, minced (or 1 teaspoon garlic powder if you’re in a hurry)
- 1 cup shredded mozzarella cheese (feel free to mix in cheddar or Monterey Jack for extra flavor)
- 1/4 cup grated Parmesan cheese
- Fresh parsley, chopped (optional, for garnish)
In my early days of experimenting in the kitchen, I learned the hard way that garlic can overpower a dish. So I’m a big fan of starting with fresh garlic but keeping it balanced with plenty of butter and cheese. The combination here is just right to get that rich, savory flavor without being too sharp or heavy.
Nutrition Facts
- Calories: Approximately 220 per cheese bomb
- Protein: 9 grams
- Fat: 12 grams
- Carbohydrates: 18 grams
- Fiber: 1 gram
- Sugar: 2 grams
- Sodium: 300 milligrams
Keep in mind, these numbers can shift slightly depending on the cheese you use and whether you swap in whole wheat flour. Still, as a treat or alongside a healthy salad, these cheese bombs fit nicely into a balanced home-cooked meal—especially when you make them with love and a side of laughter.
Print
Irresistible Buttery Garlic Cheese Bombs You Need to Try Today
Learn how to make delicious Buttery Garlic Cheese Bombs. Easy recipe with step-by-step instructions.
- Total Time: 45 minutes
- Yield: 4 servings 1x
Ingredients
- 2 cups all-purpose flour (you can swap half with whole wheat flour for a nuttier flavor)
- 1 tablespoon granulated sugar
- 1 teaspoon instant yeast
- 1/2 teaspoon salt
- 3/4 cup warm milk (about 110°F, warm to the touch but not hot)
- 2 tablespoons unsalted butter, melted (plus extra for brushing)
- 3 cloves garlic, minced (or 1 teaspoon garlic powder if you’re in a hurry)
- 1 cup shredded mozzarella cheese (feel free to mix in cheddar or Monterey Jack for extra flavor)
- 1/4 cup grated Parmesan cheese
- Fresh parsley, chopped (optional, for garnish)
In my early days of experimenting in the kitchen, I learned the hard way that garlic can overpower a dish. So I’m a big fan of starting with fresh garlic but keeping it balanced with plenty of butter and cheese. The combination here is just right to get that rich, savory flavor without being too sharp or heavy.
Instructions
- Start by warming your milk until it’s pleasantly warm to the touch, about 110°F. Stir in the sugar and yeast, then let it sit for 5-10 minutes until it’s foamy. This wakes up the yeast and signals it’s ready to work its magic.
- In a large mixing bowl, combine the flour and salt. Add the melted butter and the foamy yeast mixture. Stir together until a dough forms.
- Turn the dough out onto a lightly floured surface and knead for about 8-10 minutes. It should be soft, smooth, and just a little sticky. If it’s too sticky, sprinkle a bit more flour, but don’t go overboard—soft dough makes softer cheese bombs!
- Place your dough in a lightly oiled bowl, cover it with a clean towel or plastic wrap, and let it rise in a warm spot for 1 to 1.5 hours, until it doubles in size. Here’s where I usually take a deep breath and get the kids to help with the next step—they love playing with dough!
- Once risen, punch down the dough gently and divide it into 12 equal pieces. Flatten each piece into a small circle on your floured surface.
- Place a spoonful of shredded mozzarella and a sprinkle of Parmesan in the center of each dough circle. Add a pinch of minced garlic on top of the cheese for that aromatic punch.
- Fold the dough around the cheese, pinching the edges tightly to seal the filling inside. You want to make sure those cheesy treasures don’t escape during baking.
- Arrange the filled dough balls seam-side down on a baking tray lined with parchment paper. Cover them loosely with a towel and let them rise for another 20-30 minutes—you’ll see them puff up like little clouds ready to burst with flavor.
- Preheat your oven to 375°F. Before baking, brush the tops generously with melted butter mixed with a bit of extra minced garlic. This step is my favorite because it turns these into golden, shiny, buttery bombs of joy.
- Bake for 18-22 minutes until golden brown on top. Keep an eye on them—you’ll know they’re done when they look like they’re glowing from the inside out.
- Let them cool for about 5 minutes before serving. Trust me, the cheese will be hot and gooey, so patience here is key, though I won’t judge if you sneak one early like I often do.
- Prep Time: 15 minutes
- Cook Time: 30 minutes
- Category: Main Dish
- Method: Cooking
- Cuisine: International
Keywords: Buttery Garlic Cheese Bombs, recipe, cooking, food
Steps to Create Your Buttery Garlic Cheese Bombs
- Start by warming your milk until it’s pleasantly warm to the touch, about 110°F. Stir in the sugar and yeast, then let it sit for 5-10 minutes until it’s foamy. This wakes up the yeast and signals it’s ready to work its magic.
- In a large mixing bowl, combine the flour and salt. Add the melted butter and the foamy yeast mixture. Stir together until a dough forms.
- Turn the dough out onto a lightly floured surface and knead for about 8-10 minutes. It should be soft, smooth, and just a little sticky. If it’s too sticky, sprinkle a bit more flour, but don’t go overboard—soft dough makes softer cheese bombs!
- Place your dough in a lightly oiled bowl, cover it with a clean towel or plastic wrap, and let it rise in a warm spot for 1 to 1.5 hours, until it doubles in size. Here’s where I usually take a deep breath and get the kids to help with the next step—they love playing with dough!
- Once risen, punch down the dough gently and divide it into 12 equal pieces. Flatten each piece into a small circle on your floured surface.
- Place a spoonful of shredded mozzarella and a sprinkle of Parmesan in the center of each dough circle. Add a pinch of minced garlic on top of the cheese for that aromatic punch.
- Fold the dough around the cheese, pinching the edges tightly to seal the filling inside. You want to make sure those cheesy treasures don’t escape during baking.
- Arrange the filled dough balls seam-side down on a baking tray lined with parchment paper. Cover them loosely with a towel and let them rise for another 20-30 minutes—you’ll see them puff up like little clouds ready to burst with flavor.
- Preheat your oven to 375°F. Before baking, brush the tops generously with melted butter mixed with a bit of extra minced garlic. This step is my favorite because it turns these into golden, shiny, buttery bombs of joy.
- Bake for 18-22 minutes until golden brown on top. Keep an eye on them—you’ll know they’re done when they look like they’re glowing from the inside out.
- Let them cool for about 5 minutes before serving. Trust me, the cheese will be hot and gooey, so patience here is key, though I won’t judge if you sneak one early like I often do.
Tips for Making the Best Buttery Garlic Cheese Bombs
From my many kitchen adventures (and a few misadventures), here are some tips I swear by: Learn more: Irresistible Sticky Garlic Chicken Noodles You Need to Try Today
- Don’t rush the yeast rise. That first and second rise are what make the dough soft and airy. I’ve learned that a warm spot near the stove or a sunny window works wonders, especially in winter.
- Use fresh garlic whenever possible. The flavor is brighter and more magical—kind of like my mom’s way with a can of tomatoes and just a handful of spices.
- Seal those cheese bombs well. If you don’t pinch the dough edges tightly, you’ll have cheesy leaks in the oven. Not the worst thing, but it can make a mess!
- Butter is your best friend. Be generous with the garlic butter brushing before baking—it adds that irresistible golden crust and rich flavor.
- Experiment with cheeses. I like to mix mozzarella with a little sharp cheddar for depth, but you can go crazy here. Just keep the cheese melty and stringy.
Serving Suggestions and Pairings

These Buttery Garlic Cheese Bombs are like the perfect little sidekick for so many meals. When my kids and I sit down for a quick soup night, these bombs are the hands-down favorite companion. Here are some ideas for serving them up:
- With a big bowl of tomato soup or marinara for dipping—because who doesn’t love dunking cheesy bread into warm sauce?
- Alongside a fresh green salad with a zesty vinaigrette to balance the richness.
- As a party appetizer, paired with a variety of dips like ranch, spinach dip, or even a spicy sriracha mayo.
- With pasta dishes, especially something light like garlic lemon spaghetti or pesto pasta.
And if you’re anything like me, sometimes they’re just a snack to steal bites of while trying to keep the kitchen clean before dinner chaos erupts.
Storage and Reheating Tips
One of the best things about these garlic cheese bombs is that they don’t have to be eaten all at once (though I get it if you want to). Here’s how to keep that buttery, gooey magic around:
- Store any leftovers in an airtight container at room temperature for up to 2 days.
- If you want to keep them longer, wrap them tightly in foil or plastic wrap and freeze for up to 2 months.
- To reheat, pop them in a preheated oven at 350°F for 10-12 minutes if thawed, or 15-18 minutes if frozen, until warmed through and the crust is crisp again.
- Avoid microwaving if you can—though tempting—because it tends to make the crust soggy and chewy instead of buttery and crisp.
I often make a double batch, freeze half, and pull them out on hectic school nights when cooking feels impossible. It’s like having a secret weapon in my freezer, and trust me, it saves dinner sanity more than once.
Frequently Asked Questions
What are the main ingredients for Buttery Garlic Cheese Bombs?
The main ingredients for Buttery Garlic Cheese Bombs include the items listed in our ingredients section above. Each ingredient plays a crucial role in achieving the perfect flavor and texture.
How long does it take to make Buttery Garlic Cheese Bombs?
The total time to make Buttery Garlic Cheese Bombs includes both preparation and cooking time. Check the recipe card above for exact timing details.
Can I make Buttery Garlic Cheese Bombs ahead of time?
Yes, Buttery Garlic Cheese Bombs can often be prepared in advance. Store it properly in an airtight container in the refrigerator and consume within the recommended timeframe.
What can I serve with Buttery Garlic Cheese Bombs?
Buttery Garlic Cheese Bombs pairs well with various sides and accompaniments. Consider the serving suggestions mentioned in the recipe for the best dining experience.
Is Buttery Garlic Cheese Bombs suitable for special diets?
Depending on the ingredients used, Buttery Garlic Cheese Bombs may be adapted for various dietary needs. Check the ingredients list and consider substitutions as needed for your dietary requirements.
Final Thoughts
These Buttery Garlic Cheese Bombs are more than just a snack or side dish—they’re a little celebration of home cooking at its best: simple, approachable, and full of heart. They remind me of those early evenings in my apartment where food was never perfect, but it was always made with love and shared with the people who matter most. If you’re looking for a recipe that’s easy, crowd-pleasing, and just a bit indulgent, these are the perfect pick.
“Home cooking isn’t about perfection. It’s about messy counters, full plates, and feeding your people with love—one imperfect meal at a time.”
So go ahead, grab your mixing bowl, get a little flour on your hands, and make your own batch of buttery garlic cheese bombs. Your kitchen might get a bit messy, but I promise the smiles and full bellies will be worth every crumb.