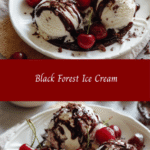
Indulge in the Decadence of Black Forest Ice Cream Delight
Black Forest Ice Cream has a special place in my heart—and honestly, it’s one of those desserts that feels like a warm hug on a chilly evening or a sweet celebration on a random Tuesday. Growing up, desserts were never fancy or complicated in our bustling apartment kitchen. But my dad’s love for rich chocolate and my mom’s knack for turning simple ingredients into magic inspired me to create this homemade version of Black Forest Ice Cream that’s both approachable and indulgent. It’s creamy, chocolatey, and studded with cherries, just like the classic cake but way cooler (literally!). If you’ve ever felt overwhelmed by dessert recipes that need a dozen steps and rare ingredients, this one’s for you—easy, family-friendly, and downright delicious.
Table of Contents
Why You’ll Love This Black Forest Ice Cream
Let me tell you, this Black Forest Ice Cream is the kind of dessert that makes you forget all about takeout or store-bought sweets. It’s rich but not too heavy, bursting with layers of chocolate, cherries, and a hint of vanilla that remind me of those late dinners with my family when the kitchen was loud, the counters messy, and the love unmistakable. Because, honestly, home cooking isn’t about perfection—it’s about sharing moments and making memories, one imperfect scoop at a time.
What I love most about this recipe is how simple it is. No fancy ice cream maker required—just a few basic ingredients you might already have, and a little patience. Plus, it’s customizable. You can swap out sugar for maple syrup, or add a splash of your favorite liqueur for grown-up magic. I remember serving this to my kids after a long day of juggling work and homework, and seeing their eyes light up made all the kitchen chaos worth it. If you want a dessert that feels homemade and heartfelt without the fuss, this Black Forest Ice Cream is your new best friend.
Ingredients You’ll Need for This Black Forest Ice Cream

- 2 cups heavy cream
- 1 cup whole milk
- 3/4 cup granulated sugar (substitute with 1/2 cup maple syrup for a natural sweetener)
- 1 teaspoon pure vanilla extract
- 1/2 cup unsweetened cocoa powder
- 1 cup pitted dark cherries, fresh or frozen (if frozen, thaw and drain)
- 1 tablespoon cherry liqueur or cherry juice (optional, but adds a nice depth)
- 1/2 cup dark chocolate chunks or chips
- A pinch of salt
When I first tried this recipe, I was worried about finding fancy cherries or chocolate. But over time, I learned that frozen cherries work just as well, and whatever chocolate you have in your pantry will do. The key is using good-quality cocoa powder—it’s what gives the ice cream that deep, authentic chocolate flavor without being overpowering. And don’t skip the pinch of salt; it balances the sweetness and brings everything to life.
Nutrition Facts
- Calories: Approximately 280 per 1/2 cup serving
- Protein: 3g
- Fat: 18g (mostly from the cream)
- Carbohydrates: 22g
- Fiber: 2g (from the cocoa and cherries)
- Sugar: 18g (can be lowered by using less sugar or natural sweeteners)
- Sodium: 40mg
Now, I’m no nutritionist, but I do appreciate knowing what I’m putting into my family’s plates—especially when it’s dessert. This Black Forest Ice Cream isn’t a diet food by any stretch, but it’s made from real, simple ingredients, and you can easily adjust the sugar to suit your family’s taste. Plus, it’s packed with antioxidants from the cocoa and cherries, which is a small win in my book!
Print
Indulge in the Decadence of Black Forest Ice Cream Delight
Learn how to make delicious Black Forest Ice Cream. Easy recipe with step-by-step instructions.
- Total Time: 45 minutes
- Yield: 4 servings 1x
Ingredients
- 2 cups heavy cream
- 1 cup whole milk
- 3/4 cup granulated sugar (substitute with 1/2 cup maple syrup for a natural sweetener)
- 1 teaspoon pure vanilla extract
- 1/2 cup unsweetened cocoa powder
- 1 cup pitted dark cherries, fresh or frozen (if frozen, thaw and drain)
- 1 tablespoon cherry liqueur or cherry juice (optional, but adds a nice depth)
- 1/2 cup dark chocolate chunks or chips
- A pinch of salt
When I first tried this recipe, I was worried about finding fancy cherries or chocolate. But over time, I learned that frozen cherries work just as well, and whatever chocolate you have in your pantry will do. The key is using good-quality cocoa powder—it’s what gives the ice cream that deep, authentic chocolate flavor without being overpowering. And don’t skip the pinch of salt; it balances the sweetness and brings everything to life.
Instructions
- In a medium saucepan, whisk together the milk, sugar, cocoa powder, and salt over medium heat. Stir constantly until the sugar dissolves and the mixture is smooth and warm, about 5 minutes. Be careful not to boil.
- Remove from heat and stir in the heavy cream and vanilla extract. Let the mixture cool to room temperature. You can place it in the fridge to speed up this step, but make sure it’s fully chilled before moving on.
- If you’re using cherry liqueur or juice, stir it in now along with the cherries. I love this part because it adds that authentic Black Forest flavor without the hassle of baking a cake.
- Pour the mixture into your ice cream maker and churn according to the manufacturer’s instructions. If you don’t have an ice cream maker, pour the mixture into a freezer-safe container and freeze for about 2 hours, then stir vigorously every 30 minutes until it reaches a creamy consistency. This mimics the churning process and helps prevent ice crystals.
- About 5 minutes before the ice cream is done churning, add the dark chocolate chunks so they get evenly distributed.
- Transfer the ice cream to an airtight container and freeze for at least 4 hours or overnight to firm up.
- Before serving, let the ice cream sit at room temperature for 5 minutes to soften slightly for easier scooping.
One thing I learned early on from watching my dad’s slow, deliberate stirring is patience. It’s tempting to rush the freezing process, but letting the ice cream firm up overnight makes all the difference in texture and flavor. Also, adding the chocolate chunks at the end keeps them from melting too much, so you get that satisfying crunch in every bite.
- Prep Time: 15 minutes
- Cook Time: 30 minutes
- Category: Main Dish
- Method: Cooking
- Cuisine: International
Keywords: Black Forest Ice Cream, recipe, cooking, food
Steps to Create Your Black Forest Ice Cream
- In a medium saucepan, whisk together the milk, sugar, cocoa powder, and salt over medium heat. Stir constantly until the sugar dissolves and the mixture is smooth and warm, about 5 minutes. Be careful not to boil.
- Remove from heat and stir in the heavy cream and vanilla extract. Let the mixture cool to room temperature. You can place it in the fridge to speed up this step, but make sure it’s fully chilled before moving on.
- If you’re using cherry liqueur or juice, stir it in now along with the cherries. I love this part because it adds that authentic Black Forest flavor without the hassle of baking a cake.
- Pour the mixture into your ice cream maker and churn according to the manufacturer’s instructions. If you don’t have an ice cream maker, pour the mixture into a freezer-safe container and freeze for about 2 hours, then stir vigorously every 30 minutes until it reaches a creamy consistency. This mimics the churning process and helps prevent ice crystals.
- About 5 minutes before the ice cream is done churning, add the dark chocolate chunks so they get evenly distributed.
- Transfer the ice cream to an airtight container and freeze for at least 4 hours or overnight to firm up.
- Before serving, let the ice cream sit at room temperature for 5 minutes to soften slightly for easier scooping.
One thing I learned early on from watching my dad’s slow, deliberate stirring is patience. It’s tempting to rush the freezing process, but letting the ice cream firm up overnight makes all the difference in texture and flavor. Also, adding the chocolate chunks at the end keeps them from melting too much, so you get that satisfying crunch in every bite. Learn more: Heavenly Delight: Indulge in the Perfect Vanilla Buttermilk Pound Cake
Tips for Making the Best Black Forest Ice Cream
Having juggled two kids, a full-time job, and a kitchen full of “helpful” little hands, I’ve picked up a few tips that turn this Black Forest Ice Cream from good to unforgettable:
- Use quality ingredients: The cocoa powder and chocolate chunks are the stars here. Don’t skimp on them.
- Chill your base well: The colder your mixture before churning, the smoother your ice cream will be.
- Don’t skip the salt: It balances the sweetness and enhances the chocolate flavor.
- Fresh or thawed cherries: If using frozen, drain them well to avoid icy pockets.
- Customize the sweetness: Taste your base before freezing and adjust sugar or sweetener as needed—remember, freezing dulls sweetness a bit.
- Patience pays off: Let the ice cream fully freeze after churning for best texture.
And here’s a little secret from my experience: if your kids are around, let them sprinkle in the chocolate chunks. It’s a fun little moment of kitchen chaos that always turns into smiles—exactly why I started HomeFoodieRecipes in the first place, to share these imperfect, joyful kitchen moments.
Serving Suggestions and Pairings

Black Forest Ice Cream shines on its own, but if you want to elevate your dessert game (or just impress your family like I do when I’m feeling fancy), here are some serving ideas that bring out the best in every scoop:
- Serve with a drizzle of warm chocolate or cherry sauce for extra indulgence
- Top with whipped cream and a fresh cherry for that classic look
- Pair with chocolate brownies or warm waffles for a decadent combo
- Add a sprinkle of toasted almonds or walnuts for crunch
- Try alongside a cup of strong coffee or espresso to balance the sweetness
I remember one evening, after a particularly hectic day, I scooped this ice cream over leftover brownies. My family’s cheers were loud enough to fill our small apartment, and honestly, that moment of shared joy is what this recipe is all about.
Storage and Reheating Tips
Since this is ice cream, “reheating” isn’t really a thing, but here’s what’s worked best for me when it comes to storing and enjoying leftovers:
- Store in an airtight container in the coldest part of your freezer to prevent ice crystals
- Press a piece of parchment paper or plastic wrap directly on the surface before sealing to keep it extra fresh
- Let sit at room temperature for 5-10 minutes before scooping to soften slightly
- If the ice cream gets too hard, stir gently with a fork after 10 minutes out of the freezer to bring back creaminess
I’ve learned the hard way that ice cream in a busy household can disappear fast, but when there’s a little left, these tips help keep it tasting fresh and smooth. And if you’re like me, sometimes it’s okay to just dig in straight from the tub—no judgment here.
Frequently Asked Questions
What are the main ingredients for Black Forest Ice Cream?
The main ingredients for Black Forest Ice Cream include the items listed in our ingredients section above. Each ingredient plays a crucial role in achieving the perfect flavor and texture.
How long does it take to make Black Forest Ice Cream?
The total time to make Black Forest Ice Cream includes both preparation and cooking time. Check the recipe card above for exact timing details.
Can I make Black Forest Ice Cream ahead of time?
Yes, Black Forest Ice Cream can often be prepared in advance. Store it properly in an airtight container in the refrigerator and consume within the recommended timeframe.
What can I serve with Black Forest Ice Cream?
Black Forest Ice Cream pairs well with various sides and accompaniments. Consider the serving suggestions mentioned in the recipe for the best dining experience.
Is Black Forest Ice Cream suitable for special diets?
Depending on the ingredients used, Black Forest Ice Cream may be adapted for various dietary needs. Check the ingredients list and consider substitutions as needed for your dietary requirements.
Final Thoughts
Black Forest Ice Cream is more than just a dessert; it’s a little slice of family history, a nod to the joyful chaos of home cooking, and a reminder that food made with love doesn’t need to be complicated. Whether you’re a busy parent like me trying to get dinner on the table while juggling a million things, or simply someone who loves a rich, satisfying treat, this recipe fits right into your life.
So next time you’re craving something chocolatey, cherry-filled, and downright comforting, give this Black Forest Ice Cream a try. It’s the kind of recipe that will make your kitchen counters messy, your plates full, and your heart a little fuller—just like all the best meals in my family’s past and present.