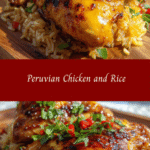
Discover the Irresistible Flavors of Peruvian Chicken and Rice
Peruvian Chicken and Rice is one of those dishes that instantly takes me back to my childhood kitchen, where the air was thick with the smell of spices and the sound of laughter. Growing up, food was never about fancy plating or complicated techniques—it was about gathering around the table, sharing stories, and filling up on hearty, flavor-packed meals. This recipe brings all of that warmth and comfort to your own kitchen, with simple ingredients and straightforward steps that even a busy mom like me can manage on a weeknight. Trust me, this Peruvian Chicken and Rice is a crowd-pleaser that’s as satisfying to make as it is to eat.
Table of Contents
Why You’ll Love This Peruvian Chicken and Rice
Let me tell you, this Peruvian Chicken and Rice isn’t your run-of-the-mill chicken and rice dish. It’s a vibrant, colorful meal with a subtle kick of spices and a fresh tang from the citrus and herbs that make it so unique. I remember the first time I made it, standing on a wobbly chair beside my dad didn’t prepare me for the magic of roasting chicken with a marinade that’s both bright and earthy. The rice, cooked in the flavorful juices, soaks up every bit of that goodness, making it impossible to leave leftovers untouched.
What makes this recipe a winner in my hectic household is its simplicity and how adaptable it is. Whether you’re juggling homework, bedtime stories, or just trying to keep the noise level down, this dish comes together quickly without sacrificing flavor. It’s also a fantastic way to sneak in some veggies if you toss in peas or bell peppers. And if you’ve ever felt overwhelmed by recipes that call for a million exotic ingredients, this one keeps things real—ingredients you can find easily and understand.
Ingredients You’ll Need for This Peruvian Chicken and Rice

- 4 bone-in, skin-on chicken thighs (you can use breasts if you prefer, but thighs stay juicier)
- 1 ½ cups long-grain white rice
- 3 cups low-sodium chicken broth
- 1 large onion, finely chopped
- 3 cloves garlic, minced
- 1 tablespoon paprika (smoked if you have it for extra depth)
- 1 teaspoon ground cumin
- 1 teaspoon dried oregano (preferably Mexican oregano, but regular works too)
- 1 teaspoon salt, plus more to taste
- ½ teaspoon black pepper
- 1 large lime (juice and zest)
- ¼ cup fresh cilantro, chopped (optional but highly recommended)
- 2 tablespoons olive oil or avocado oil
- 1 cup frozen peas (optional, for a pop of color and sweetness)
- 1 small red bell pepper, diced (optional)
If you don’t have chicken broth on hand, water with a bouillon cube or even vegetable broth can work in a pinch. And if fresh lime isn’t available, bottled lime juice will do, though the fresh zest really brightens up the dish.
Nutrition Facts
- Calories: Approximately 450 per serving
- Protein: 35g
- Fat: 18g (mostly from the chicken skin and olive oil)
- Carbohydrates: 35g
- Fiber: 3g
- Sugar: 3g (mostly from the onion and bell pepper)
- Sodium: 700mg (can be lowered by using low-sodium broth and less salt)

Discover the Irresistible Flavors of Peruvian Chicken and Rice
Learn how to make delicious Peruvian Chicken and Rice. Easy recipe with step-by-step instructions.
- Total Time: 45 minutes
- Yield: 4 servings 1x
Ingredients
- 4 bone-in, skin-on chicken thighs (you can use breasts if you prefer, but thighs stay juicier)
- 1 ½ cups long-grain white rice
- 3 cups low-sodium chicken broth
- 1 large onion, finely chopped
- 3 cloves garlic, minced
- 1 tablespoon paprika (smoked if you have it for extra depth)
- 1 teaspoon ground cumin
- 1 teaspoon dried oregano (preferably Mexican oregano, but regular works too)
- 1 teaspoon salt, plus more to taste
- ½ teaspoon black pepper
- 1 large lime (juice and zest)
- ¼ cup fresh cilantro, chopped (optional but highly recommended)
- 2 tablespoons olive oil or avocado oil
- 1 cup frozen peas (optional, for a pop of color and sweetness)
- 1 small red bell pepper, diced (optional)
If you don’t have chicken broth on hand, water with a bouillon cube or even vegetable broth can work in a pinch. And if fresh lime isn’t available, bottled lime juice will do, though the fresh zest really brightens up the dish.
Instructions
- Preheat your oven to 400°F (200°C). While it heats, pat the chicken thighs dry with paper towels—this helps the skin get crispy later.
- In a small bowl, mix together paprika, cumin, oregano, salt, pepper, and half of the minced garlic. Rub this spice blend all over the chicken thighs, making sure to get it under the skin where possible. Let the chicken sit at room temperature while you prep the rest.
- Heat 1 tablespoon of olive oil in a large oven-safe skillet or Dutch oven over medium-high heat. Once hot, add the chicken thighs skin-side down. Cook for about 5-7 minutes without moving them until the skin is golden and crisp. Flip and cook the other side for 3 minutes. Remove the chicken and set aside.
- In the same skillet, add the remaining olive oil if needed, then toss in the chopped onion, bell pepper (if using), and the remaining garlic. Sauté for 3-4 minutes until the onion is soft and translucent.
- Add the rice to the skillet, stirring well to coat the grains in oil and toast slightly, about 1-2 minutes. This step helps develop a nutty flavor in the rice.
- Pour in the chicken broth, lime juice, and zest, and stir in the frozen peas if you’re using them. Bring the liquid to a gentle simmer.
- Return the chicken thighs to the skillet, placing them skin-side up on top of the rice. Transfer the skillet to the preheated oven.
- Bake uncovered for 25-30 minutes, or until the rice is tender and has absorbed most of the liquid, and the chicken reaches an internal temperature of 165°F (74°C).
- Remove from the oven and let it rest for 5 minutes. Sprinkle chopped cilantro over the top before serving for a fresh, herbaceous finish.
One trick I learned from my mom’s kitchen is to let the rice rest covered for a few minutes after cooking. It helps the grains fluff up nicely and soak in extra flavor, just like her magic tomato dishes.
- Prep Time: 15 minutes
- Cook Time: 30 minutes
- Category: Main Dish
- Method: Cooking
- Cuisine: International
Keywords: Peruvian Chicken and Rice, recipe, cooking, food
Steps to Create Your Peruvian Chicken and Rice
- Preheat your oven to 400°F (200°C). While it heats, pat the chicken thighs dry with paper towels—this helps the skin get crispy later.
- In a small bowl, mix together paprika, cumin, oregano, salt, pepper, and half of the minced garlic. Rub this spice blend all over the chicken thighs, making sure to get it under the skin where possible. Let the chicken sit at room temperature while you prep the rest.
- Heat 1 tablespoon of olive oil in a large oven-safe skillet or Dutch oven over medium-high heat. Once hot, add the chicken thighs skin-side down. Cook for about 5-7 minutes without moving them until the skin is golden and crisp. Flip and cook the other side for 3 minutes. Remove the chicken and set aside.
- In the same skillet, add the remaining olive oil if needed, then toss in the chopped onion, bell pepper (if using), and the remaining garlic. Sauté for 3-4 minutes until the onion is soft and translucent.
- Add the rice to the skillet, stirring well to coat the grains in oil and toast slightly, about 1-2 minutes. This step helps develop a nutty flavor in the rice.
- Pour in the chicken broth, lime juice, and zest, and stir in the frozen peas if you’re using them. Bring the liquid to a gentle simmer.
- Return the chicken thighs to the skillet, placing them skin-side up on top of the rice. Transfer the skillet to the preheated oven.
- Bake uncovered for 25-30 minutes, or until the rice is tender and has absorbed most of the liquid, and the chicken reaches an internal temperature of 165°F (74°C).
- Remove from the oven and let it rest for 5 minutes. Sprinkle chopped cilantro over the top before serving for a fresh, herbaceous finish.
One trick I learned from my mom’s kitchen is to let the rice rest covered for a few minutes after cooking. It helps the grains fluff up nicely and soak in extra flavor, just like her magic tomato dishes. Learn more: Discover the Irresistible Flavors of Shanghai Fried Noodles
Tips for Making the Best Peruvian Chicken and Rice
- Use bone-in, skin-on chicken: It’s juicier and adds more flavor to the rice as it cooks.
- Don’t skip browning the chicken: Crispy skin and caramelized bits on the pan add depth to the dish.
- Toast the rice: This simple step creates a nuttier flavor and prevents mushy rice, something I always remind myself when rushing through weeknight dinners.
- Adjust spices to your taste: If you prefer more heat, add a pinch of cayenne or a diced chili.
- Fresh lime juice and zest: These brighten the dish and are worth the extra squeeze. I remember my dad always insisting on fresh citrus—he said it “woke up” the meal.
- Use a heavy, oven-safe pan: A Dutch oven or cast iron skillet works best for even cooking and easy transfer to the oven.
- Make it a one-pan meal: Toss in extra veggies like chopped carrots or green beans to stretch the meal and add nutrition.
Serving Suggestions and Pairings

This Peruvian Chicken and Rice shines on its own, but if you want to round out the meal, here are a few ideas that have become staples in my house:
- A simple green salad with a tangy vinaigrette to cut through the richness
- Avocado slices or guacamole for creaminess and that extra boost of healthy fats
- Grilled or roasted vegetables, like asparagus or zucchini, for added color and crunch
- Peruvian-style sauces like aji verde (a cilantro and jalapeño sauce) if you want to amp up the authenticity and spice
- For dessert, something quick and comforting, like a cinnamon-spiced rice pudding, echoes the homey vibes of the main dish
Storage and Reheating Tips
Like many home cooks juggling a full schedule, I often make a double batch of this Peruvian Chicken and Rice so I have leftovers ready. Here’s how to keep it tasting fresh:
- Store leftovers in an airtight container in the fridge for up to 3 days.
- When reheating, add a splash of water or chicken broth to loosen the rice and cover with a microwave-safe lid or damp paper towel to keep moisture in.
- Reheat gently on the stovetop over low heat, stirring occasionally, for best texture.
- If freezing, portion into freezer-safe containers and thaw overnight in the fridge before reheating.
Frequently Asked Questions
What are the main ingredients for Peruvian Chicken and Rice?
The main ingredients for Peruvian Chicken and Rice include the items listed in our ingredients section above. Each ingredient plays a crucial role in achieving the perfect flavor and texture.
How long does it take to make Peruvian Chicken and Rice?
The total time to make Peruvian Chicken and Rice includes both preparation and cooking time. Check the recipe card above for exact timing details.
Can I make Peruvian Chicken and Rice ahead of time?
Yes, Peruvian Chicken and Rice can often be prepared in advance. Store it properly in an airtight container in the refrigerator and consume within the recommended timeframe.
What can I serve with Peruvian Chicken and Rice?
Peruvian Chicken and Rice pairs well with various sides and accompaniments. Consider the serving suggestions mentioned in the recipe for the best dining experience.
Is Peruvian Chicken and Rice suitable for special diets?
Depending on the ingredients used, Peruvian Chicken and Rice may be adapted for various dietary needs. Check the ingredients list and consider substitutions as needed for your dietary requirements.
Final Thoughts
Peruvian Chicken and Rice is more than just a meal—it’s a little slice of home, comfort, and connection wrapped up in one skillet. It’s the kind of dish that fits right into the messy, loud, and love-filled kitchen I grew up in and now try to recreate for my own kids. It’s forgiving, flavorful, and approachable, which is exactly what we need when life feels overwhelming.
Whether you’re a beginner cook or someone like me who’s learned to tame a busy schedule with simple, wholesome food, this recipe has your back. Give it a try and make it your own—add a splash of your favorite hot sauce, throw in some extra veggies, or just savor it as is with the family. Because at the end of the day, feeding the people we love with meals that bring us joy is what home cooking is all about.